Mini chocoflan might just be the most magical dessert you’ll ever bake. It’s part creamy flan, part rich chocolate cake—and somehow, the two layers switch places in the oven without you doing a thing. That’s why it’s lovingly called “the impossible cake.” In this post, I’ll show you exactly how to make adorable, individual-sized versions of chocoflan that are just as impressive as the original. We’ll walk through the ingredients, layering technique, baking tips, and even answer common questions like why chocoflan won’t set or whether you can use brownie mix.
Table of Contents
Table of Contents
Mini Chocoflan Magic in Our Family Kitchen
I still remember the first time Grandma Carmen made chocoflan in our kitchen in Santa Fe. I was maybe ten, standing on a stool with floured fingers and wide eyes, watching as she poured caramel into a bundt pan, then layered flan and chocolate cake batter on top. “Just watch,” she whispered. “It’s a little magic trick.” Sure enough, when the pan came out of the oven and cooled, the flan had sunk to the bottom, and the cake had risen like a soft crown. We cut into it, and I was hooked foreve
As life got busier—with my daughter starting school, my mom picking up evening shifts, and the holidays always around the corner—I started making a mini chocoflan version. They’re perfect for gifting, portioning, or just indulging without making a whole cake. These little desserts bring back every bit of that childhood wonder, but now I get to share it with my own daughter, right alongside Grandma Carmen.
Mini chocoflan has become a tradition for us—especially during the holidays or birthdays. Each tiny cake feels like its own celebration. And once you see how simple it is to make, you’ll want to serve them at every gathering too.
What Is Mini Chocoflan, and Why Do We Call It ‘Impossible’?
Chocoflan, or pastel imposible as it’s called in Mexico, is a two-layer dessert that defies logic. You pour the chocolate cake batter on top of a creamy flan mixture, but during baking, the layers magically swap. The cake ends up on the bottom, and the silky flan floats to the top, creating a picture-perfect dessert that unmolds like a dream.
Mini chocoflan works exactly the same way, just in small, individual ramekins or muffin tins. The process may seem complex, but it’s surprisingly easy once you understand how the density of the flan and cake work together. That’s part of the charm—baking it feels like pulling off a delicious magic trick, especially when you flip them over and reveal that golden layer of flan.
Whether you’re a longtime fan of Mexican desserts or trying chocoflan for the first time, the mini version is a must-bake. It’s rich, creamy, chocolatey, and perfectly portioned for one (or two if you’re sharing—no judgment). You’ll find that this recipe fits beautifully alongside others on my site like our Easy Margarita Tres Leches Cake Mexican dessert recipes, passed down from my family to yours.
Ingredients you will need for Foolproof Mini Chocoflan
Mini Chocoflan Ingredients & Pan Choices
Mini chocoflan might look fancy, but it comes together with everyday ingredients and simple tools you likely already have. The secret to getting those dreamy, distinct layers lies in the preparation—and a bit of patience. Here’s what you’ll need:
For the flan layer:
- 1 (14 oz) can sweetened condensed milk
- 1 (12 oz) can evaporated milk
- 3 large eggs
- 1 teaspoon vanilla extract
For the chocolate cake layer:
- 1 box chocolate cake mix (or your favorite homemade chocolate cake batter)
- Ingredients listed on your cake mix (usually eggs, oil, and water)
For the caramel:
- ½ cup cajeta (goat’s milk caramel) or store-bought caramel sauce
how to make mini chocoflan
To make individual portions, ramekins are a great choice. I use 6-ounce glass or ceramic ramekins for a classic presentation, but silicone muffin pans or metal jumbo muffin tins work well too. Just be sure to grease them thoroughly or use baking spray with flour to ensure clean release.
For an extra depth of flavor, we love using cajeta—a caramel made from goat’s milk that you’ll find in my cajeta caramel sauce post. It brings a tangy sweetness that balances the richness of the cake and flan beautifully.
Prepping the Layers to Defy Gravity
The layering technique might feel backwards, but trust the process—it’s what makes mini chocoflan so magical.
- Start with caramel: Spoon about one tablespoon of cajeta or caramel sauce into the bottom of each ramekin. Tilt the dish slightly to coat the bottom if needed.
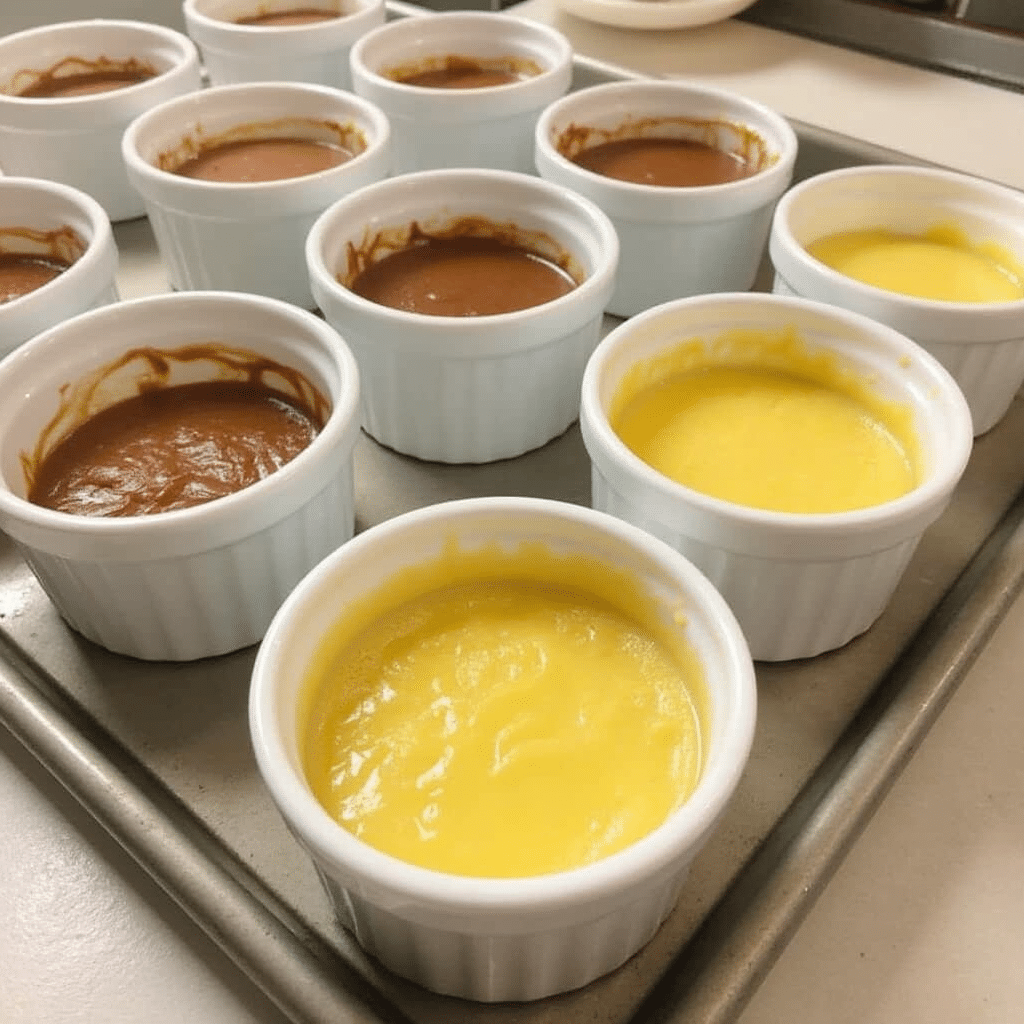
- Pour the flan mixture: Blend the condensed milk, evaporated milk, eggs, and vanilla until smooth. Carefully divide it among the ramekins, pouring right over the caramel.
- Top with cake batter: Prepare your chocolate cake mix as directed. Gently spoon or pour it on top of the flan. Don’t worry if it floats or mixes a bit—during baking, the layers will separate perfectly.
- Prepare a water bath: Place your ramekins in a deep baking dish. Pour hot water into the dish to come halfway up the sides of the ramekins. This baño maría (water bath) ensures even baking and protects the flan from curdling.
This setup is the key to getting that creamy custard texture without cracks, it’s all about balancing heat and moisture.

Once you’ve layered everything, cover the baking dish loosely with foil and slide it into a preheated 350°F oven. The real magic happens now—give it time, and those layers will flip like clockwork.
Baking, Cooling & Troubleshooting Mini Chocoflan
How to Bake Mini Chocoflan Perfectly Every Time
Once your mini chocoflan ramekins are nestled in their water bath, it’s time to bake. Set your oven to 350°F and bake for about 45–50 minutes. You’ll know they’re done when a toothpick inserted into the center comes out mostly clean, with just a few moist crumbs from the cake layer.
Because these are smaller than traditional chocoflan, they’ll bake faster—but they still need that gentle, even heat from the water bath. Avoid opening the oven door too often; sudden changes in temperature can cause the flan to crack or the cake to deflate.
After baking, remove the ramekins carefully from the water bath and let them cool to room temperature. Then refrigerate them for at least 4 hours, preferably overnight. This chilling step is essential—it allows the flan to fully set and makes unmolding a breeze.
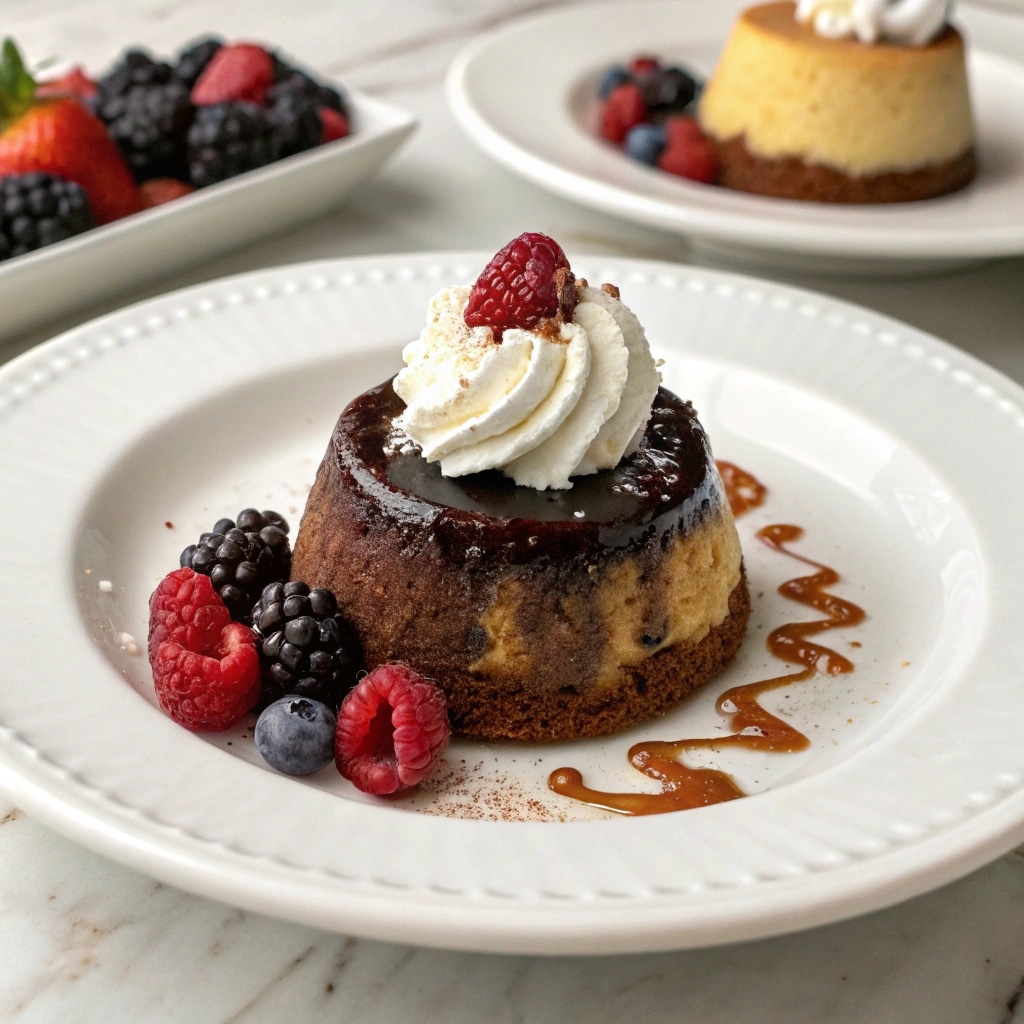
When you’re ready to serve, run a knife around the edge of each ramekin, place a dessert plate on top, and flip gently. The mini chocoflan should release with a satisfying plop, revealing a glossy layer of caramel and perfectly separated flan and cake.
Why Is My Chocoflan Not Cooking? Common Fixes
Mini chocoflan is forgiving, but a few hiccups can happen. If your chocoflan didn’t set, baked unevenly, or just didn’t turn out quite right, don’t worry—we’ve all been there.
Here are the most common issues and how to fix them:
- Flan is runny or undercooked: This usually means it didn’t bake long enough. Check with a toothpick—if it’s completely wet, add another 10–15 minutes in the oven. Make sure your water bath is hot when you start, and cover loosely with foil to trap steam.
- Cake is sunken or dense: Overmixing the cake batter or baking at too low a temperature can cause this. Use fresh cake mix or a light homemade recipe, and be gentle when spooning the batter over the flan layer.
- The layers didn’t separate: It’s rare, but if the cake and flan mix together, it’s often due to pouring too quickly or skipping the water bath. Be slow and steady when layering, and always use the baño maría.
- Texture is rubbery: This means the flan was overbaked or the oven was too hot. Check your oven with an oven thermometer and stick to 350°F. Remember, altitude can also affect baking. Here in Santa Fe, we sometimes have to lower our oven temp slightly and extend the bake time for perfect results.
These are the kinds of tips we’ve learned through years of making holiday desserts ideas that have to travel well, set up right, and wow a crowd. And once you’ve mastered these mini versions, you’ll never want to go back to full-size.
Fun Variations & Serving Tips for Mini Chocoflan

Can I Make Mini Chocoflan with Brownie Mix? Yes—Here’s How
Absolutely! Brownie mix is a fun twist on the classic chocolate cake layer in mini chocoflan. It makes the base denser, fudgier, and rich enough to feel like a flourless chocolate dessert. If you’re short on time or just love a chewy bite, using a brownie mix is a fantastic option.
Here’s how to adapt it:
- Prepare your brownie mix as directed, but reduce the water by about 1–2 tablespoons to keep the texture thick enough to hold under the flan layer.
- Spoon the batter gently over the flan mixture, just like you would with regular cake batter.
- Bake a bit longer—50 to 55 minutes—since brownies are denser and take a little more time to set.
This version is ideal for chocolate lovers and has earned a spot in our lineup of party perfect desserts, If you’ve got a potluck or a last-minute celebration, these mini brownie chocoflans look impressive and taste like you spent hours.
You can also experiment with flavored cake mixes—like devil’s food, red velvet, or even chocolate spice—for a unique spin. Just adjust your baking time accordingly and keep the water bath steady and hot.
How to Serve, Store, and Wow Guests
Once your mini chocoflans are chilled and flipped, you’ve got a blank canvas for presentation. The top layer of flan and caramel is already gorgeous, but here are a few simple upgrades that make them pop:
- Whipped cream: Pipe a dollop on top or alongside the plate
- Berries: Fresh raspberries, strawberries, or sliced bananas
- Crushed nuts: Pecans or walnuts add a perfect crunch
- Chocolate drizzle: Warm ganache or melted dark chocolate
For extra flair, serve them with mini spoons or place them in festive paper liners for individual servings. They’re perfect for birthdays, bridal showers, or just Tuesday nights when you need something special.
Mini chocoflan keeps well, too. Store them in the fridge in an airtight container for up to 3 days. If you’re making ahead, you can bake them, chill overnight, and unmold just before serving.
FAQs About Mini Chocoflan
Why is chocoflan called the impossible cake?
Chocoflan earns the nickname “impossible cake” because of its magical transformation in the oven. You layer cake batter on top of flan, yet after baking, they flip—cake on the bottom, flan on top—without you doing a thing. It looks impossible, but it’s just science and density at work.
Why is my chocoflan not cooking?
If your chocoflan is undercooked, the most common causes are too-low oven temperature, skipping the water bath, or removing it from the oven too early. Use a toothpick test in the center. If it’s still wet, add baking time in 5-minute increments. Make sure you’re using hot water for the water bath and baking at 350°F.
What do you need for chocoflan?
To make mini chocoflan, you’ll need ramekins, caramel (like cajeta), flan ingredients (evaporated milk, condensed milk, eggs, vanilla), chocolate cake or brownie mix, and a baking dish for the water bath. That’s it! Most of these items are pantry staples or easy to find at any grocery store.
Conclusion :
Making mini chocoflan at home is more than just baking—it’s keeping a tradition alive, one little ramekin at a time. Every time I flip a mini chocoflan and see that perfect caramel-topped flan layer resting on rich chocolate cake, I think of Grandma Carmen smiling with pride. These desserts are about more than just taste—they’re about connection, comfort, and a little sweet magic in your own kitchen.
Whether you’re baking for family, a celebration, or simply because it’s Tuesday, I hope these mini chocoflans bring you the same joy they bring to our table. Now go ahead—try the impossible.
Print
Mini Chocoflan Recipe: Make the Impossible Cake in Ramekins
- Prep Time: 20 minutes
- Cook Time: 50 minutes
- Total Time: 1 hr 10 min (chill time 5 hours)
- Yield: 6–8 mini chocoflans
- Category: Dessert
- Method: Baking
- Cuisine: Mexican
- Diet: Vegetarian
Description
Mini chocoflan is a magical Mexican dessert with rich chocolate cake and creamy flan layered over cajeta caramel, baked in individual ramekins.
Ingredients
1/2 cup cajeta or caramel sauce
1 (14 oz) can sweetened condensed milk
1 (12 oz) can evaporated milk
3 large eggs
1 tsp vanilla extract
1 box chocolate cake mix (or brownie mix)
Ingredients as required by your cake mix (usually eggs, oil, and water)
Instructions
1. Preheat oven to 350°F and grease 6–8 ramekins.
2. Add 1 tbsp cajeta to each ramekin, coating the bottom.
3. Blend condensed milk, evaporated milk, eggs, and vanilla for flan layer.
4. Pour flan mixture evenly over caramel in ramekins.
5. Prepare cake mix as instructed; spoon over flan gently.
6. Place ramekins in deep baking dish and fill with hot water halfway up.
7. Cover with foil and bake 45–50 minutes.
8. Cool to room temperature, then chill at least 4 hours.
9. To serve, loosen edges with a knife and invert onto plates.
Notes
For richer results, substitute cake mix with brownie mix and bake 5–10 minutes longer.
Store in fridge for up to 3 days in airtight containers.
Perfect make-ahead dessert for parties or family gatherings.

